Publications Updated - Artful Media: Nuage Vert
I'm excited to note I've updated my Publications page with an exciting bit of work that was recently published in IEEE MultiMedia!
Helen and Heiko asked me to contribute to this article about the Nuage Vert project. Abstract included and link to IEEE article below. Check it out in your July-September issue of IEEE Multimedia or get it online (fee based).
Editor's Note
Nuage Vert [Green Cloud] is a major environmental artwork that engages light and public participation. A stunning and important work, Nuage Vert has won many accolades and several prestigious prizes, including the 2008 Golden Nica in Hybrid Art from Ars Electronica, the 2008 Green Prix from ZeroOne, and the 2009 Award from the Environmental Art Foundation. The implementation process is particularly interesting as the team found new and successful ways to work with lasers that will benefit future artists.
—Norie Neumark
Helen Evans, Heiko Hansen, Joey Hagedorn, "Artful Media: Nuage Vert," IEEE MultiMedia, vol. 16, no. 3, pp. 13-15, July-Sept. 2009, doi:10.1109/MMUL.2009.54
DMX-512 add on for EasyLase USB
Today I had a great time going to Maker Faire in San Mateo. It really is inspirational for one's own projects to see other neat work being done.
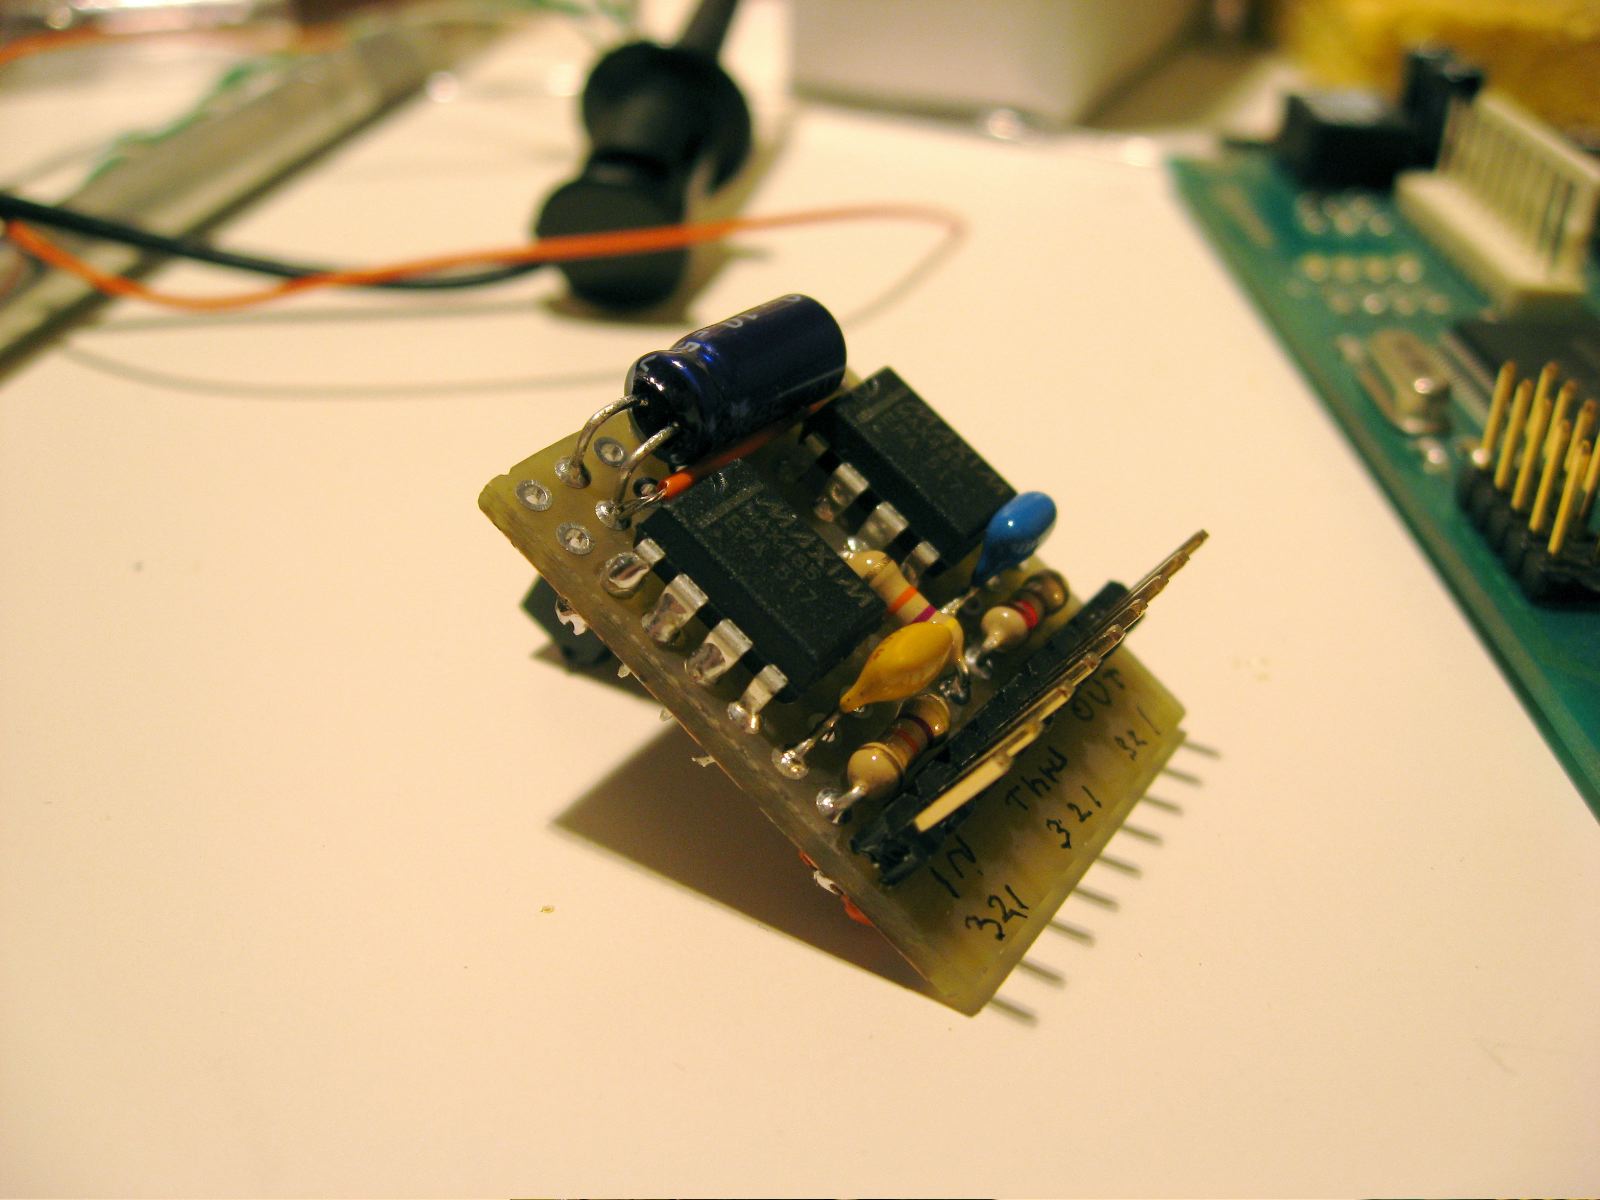
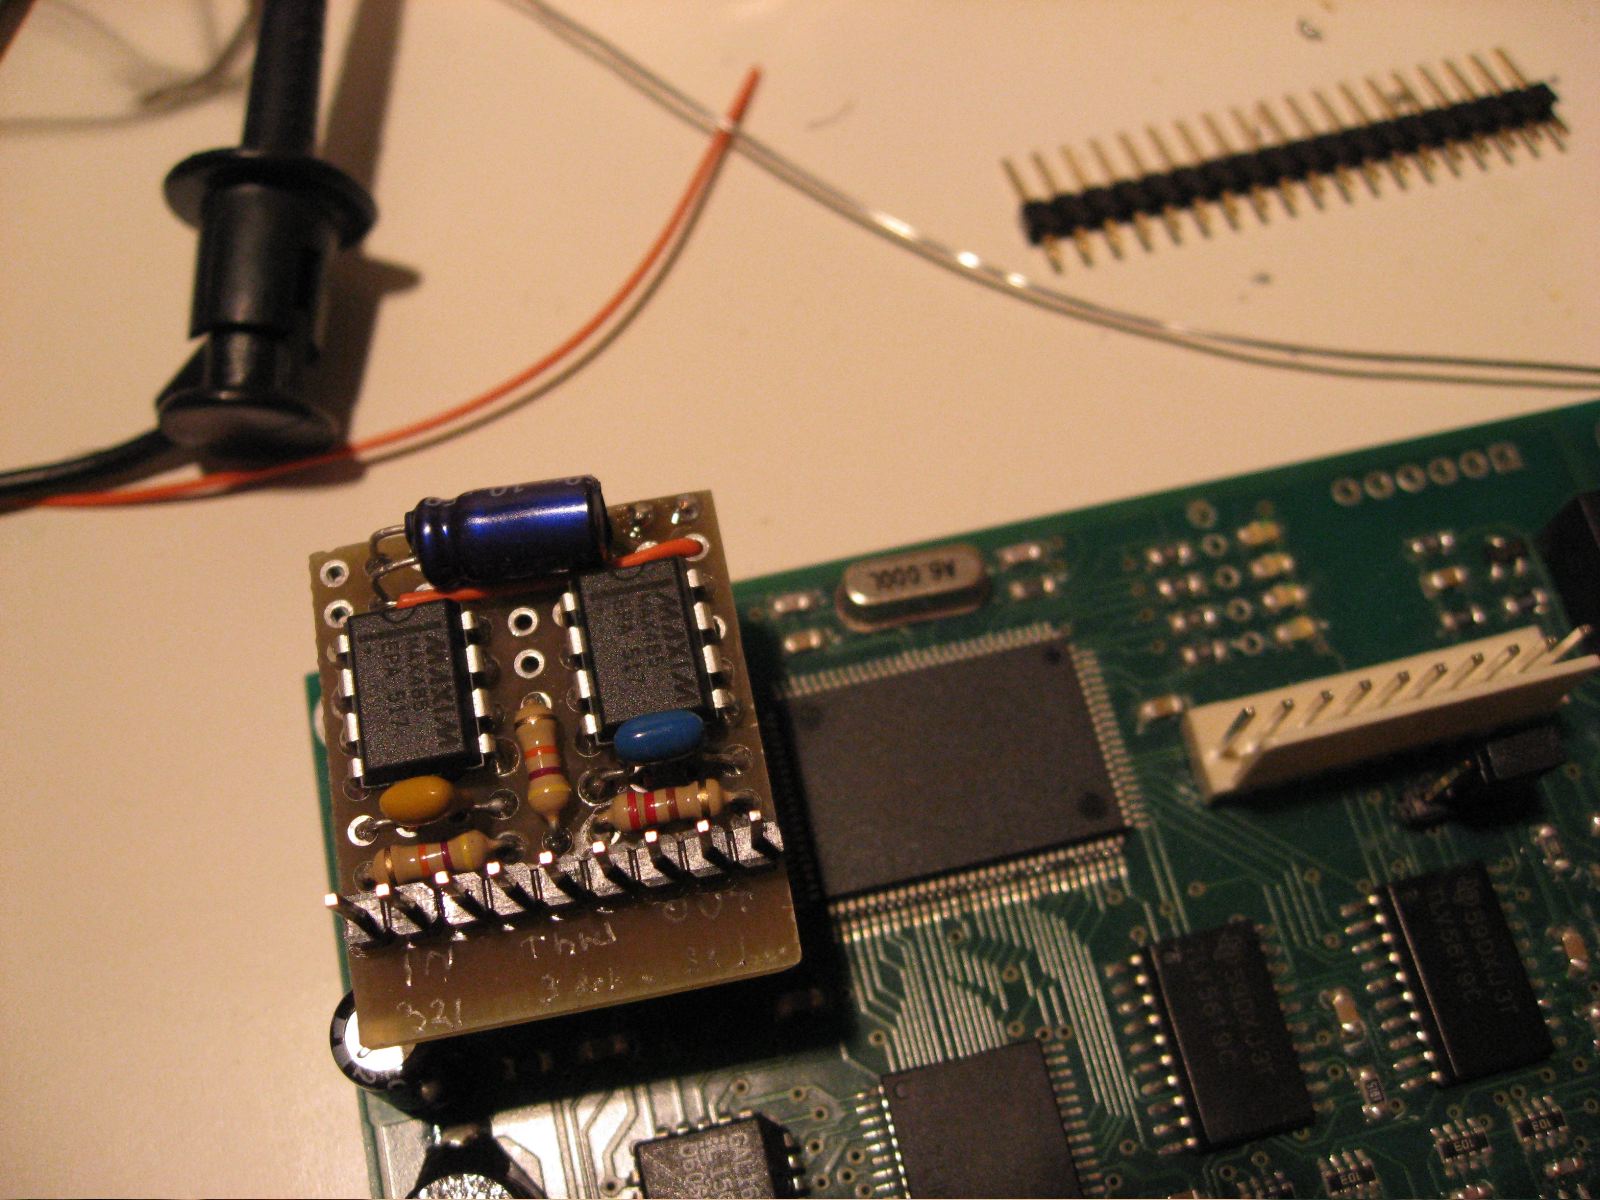
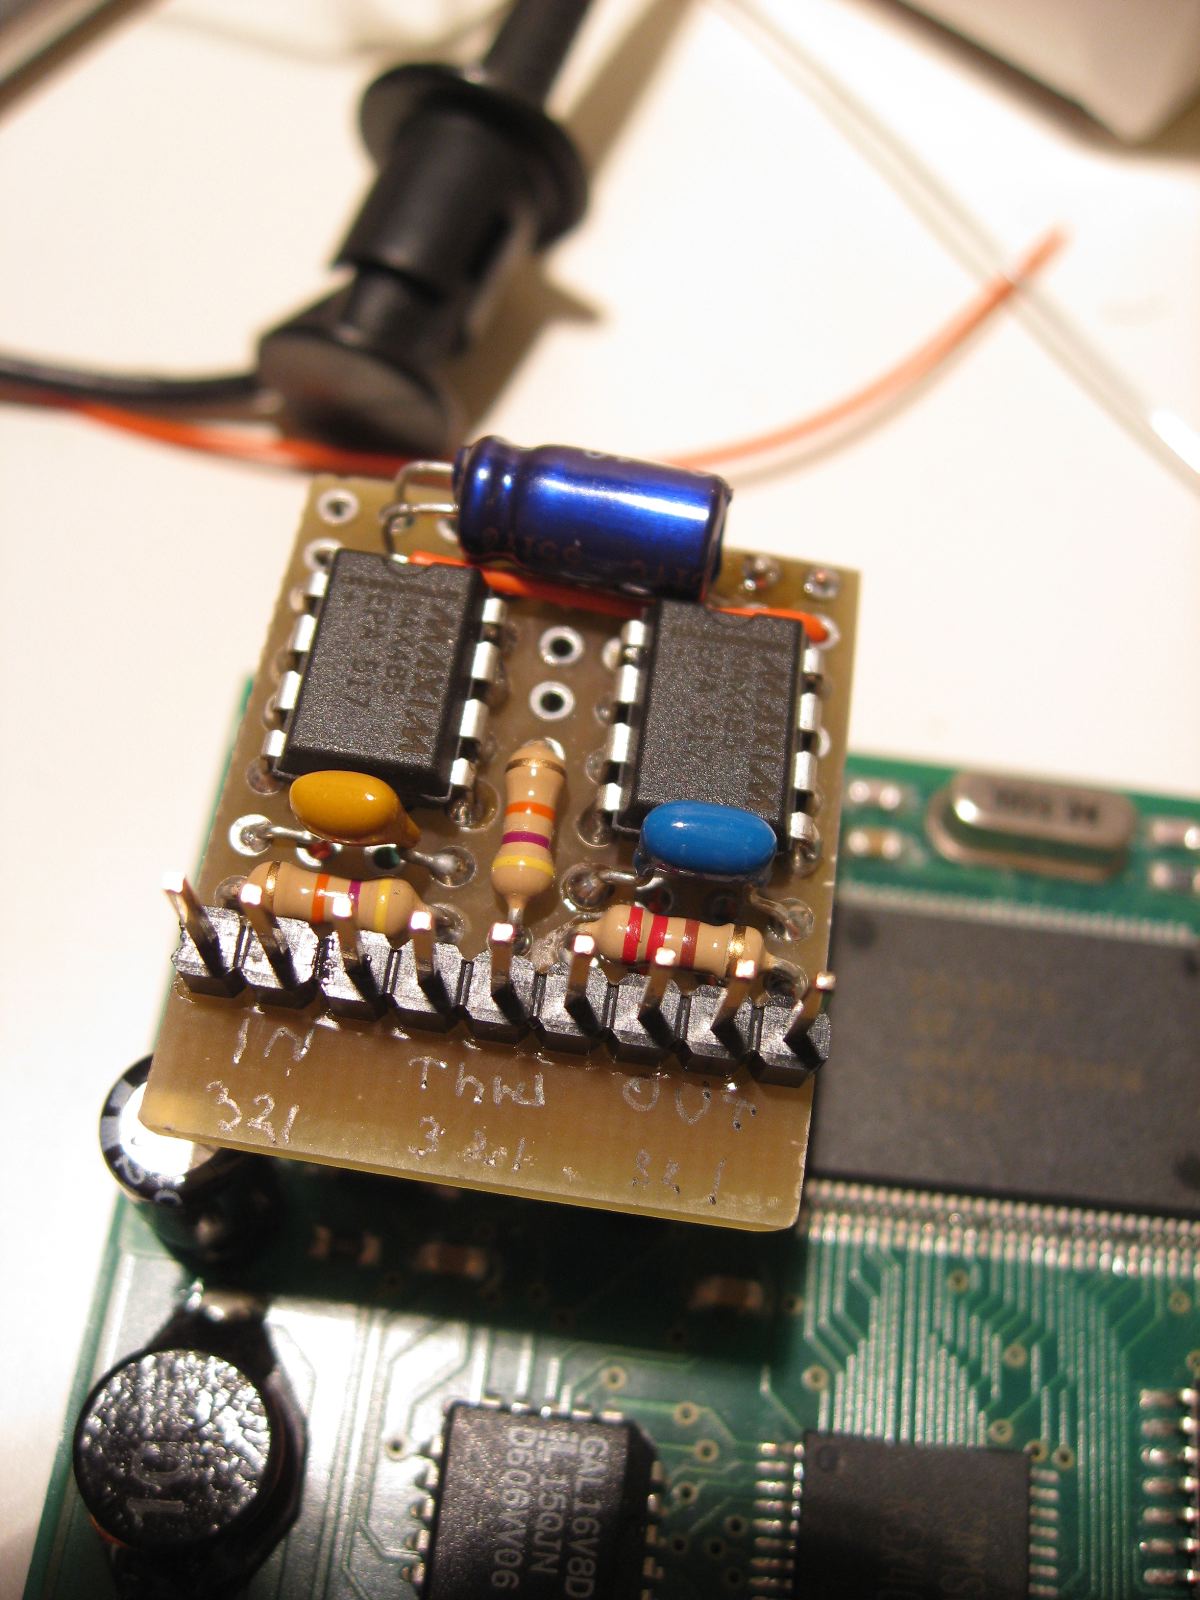
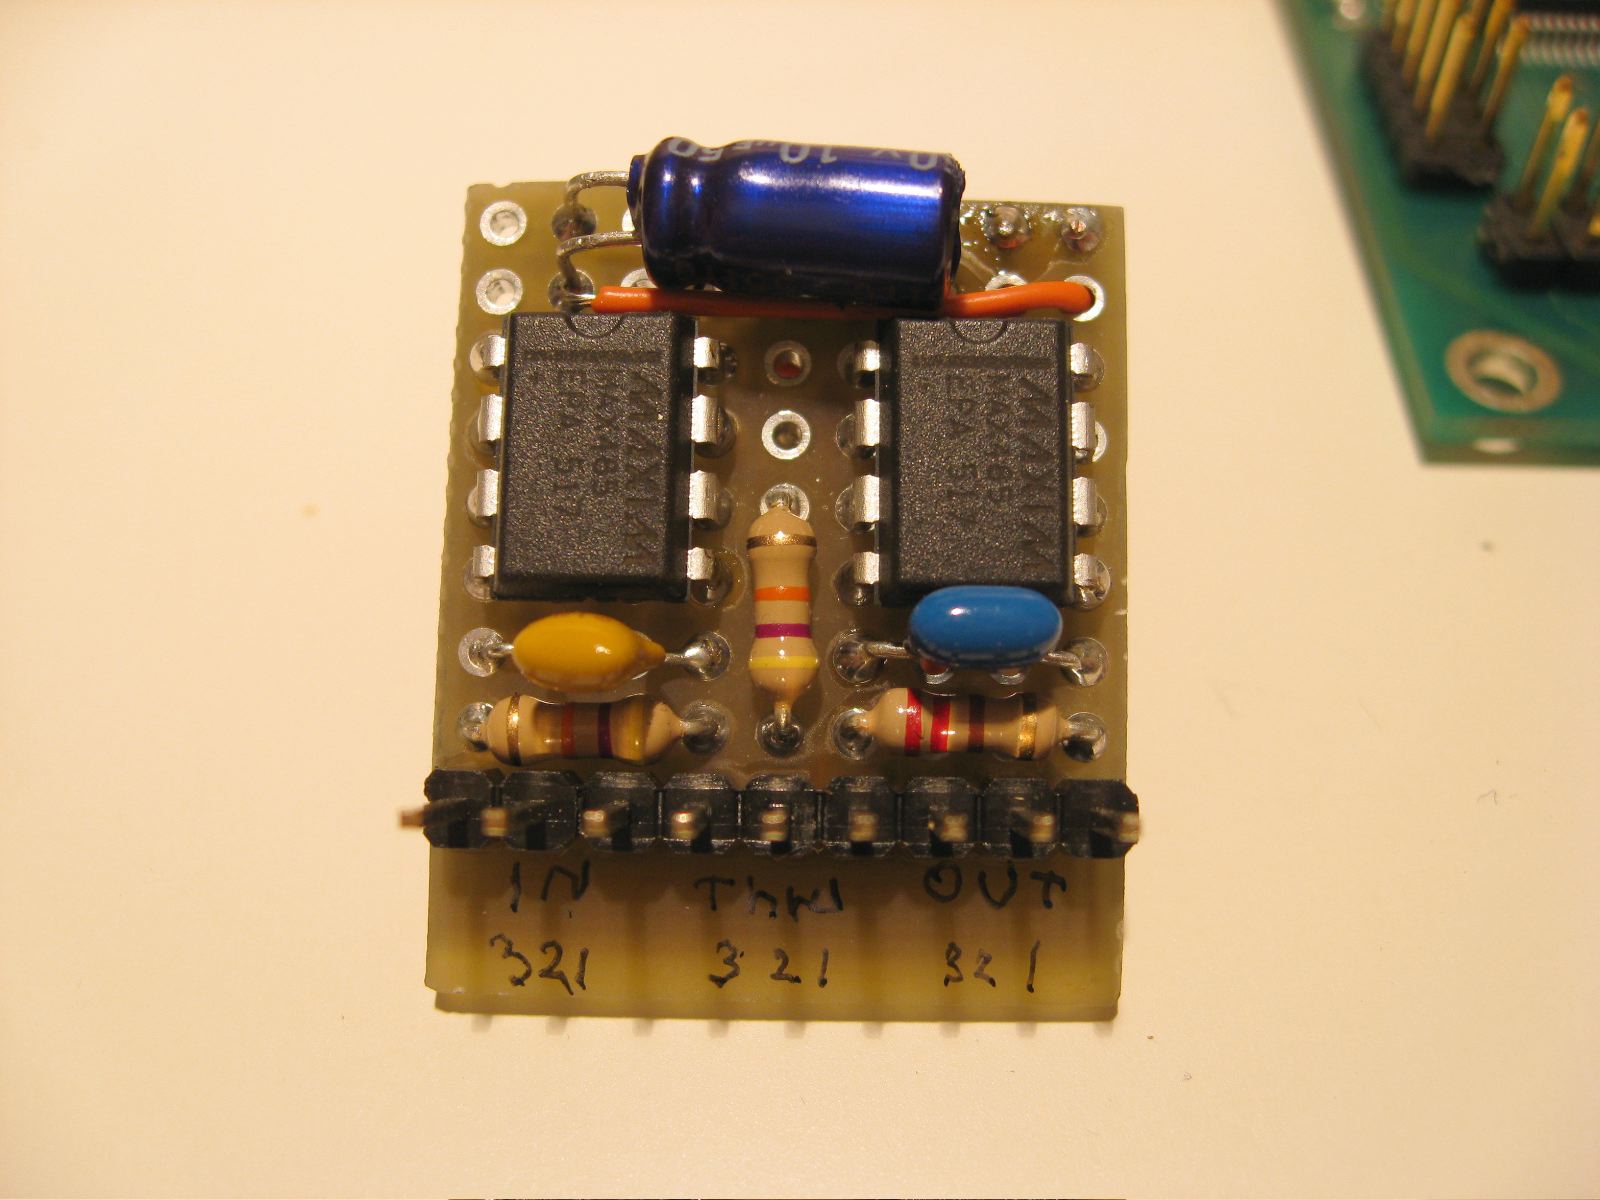
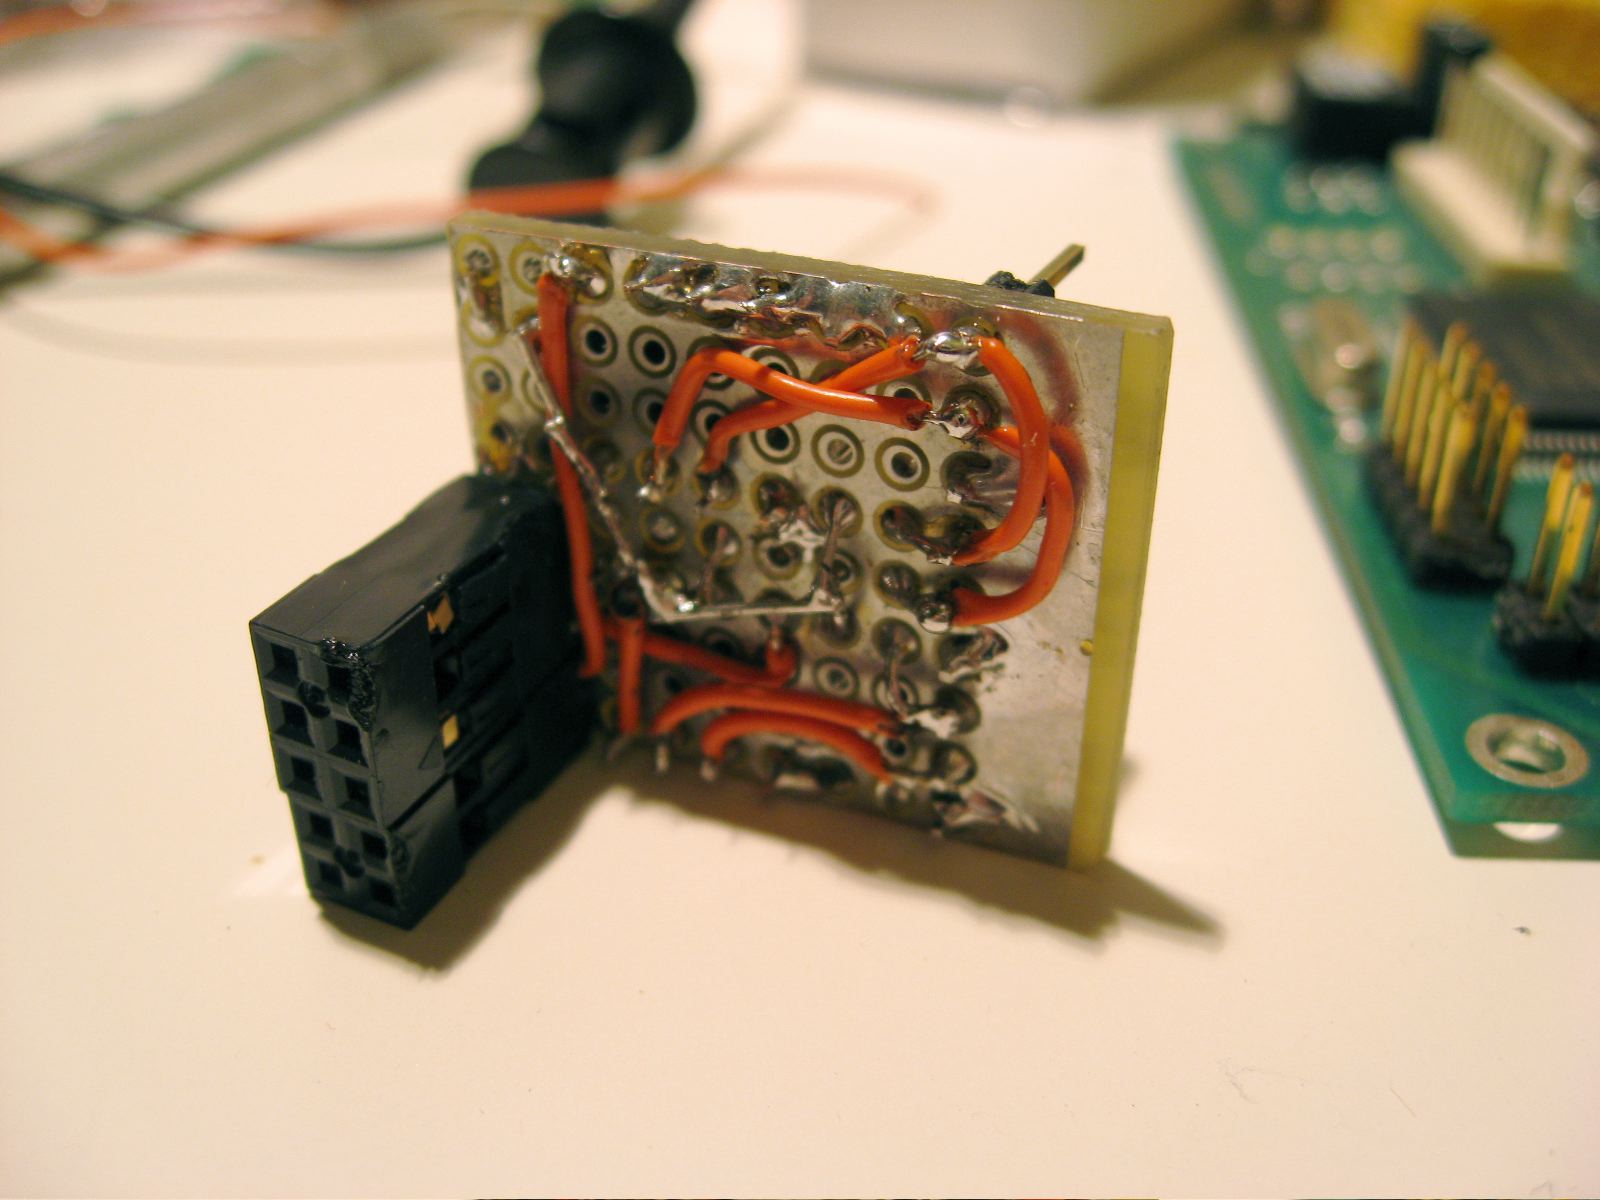
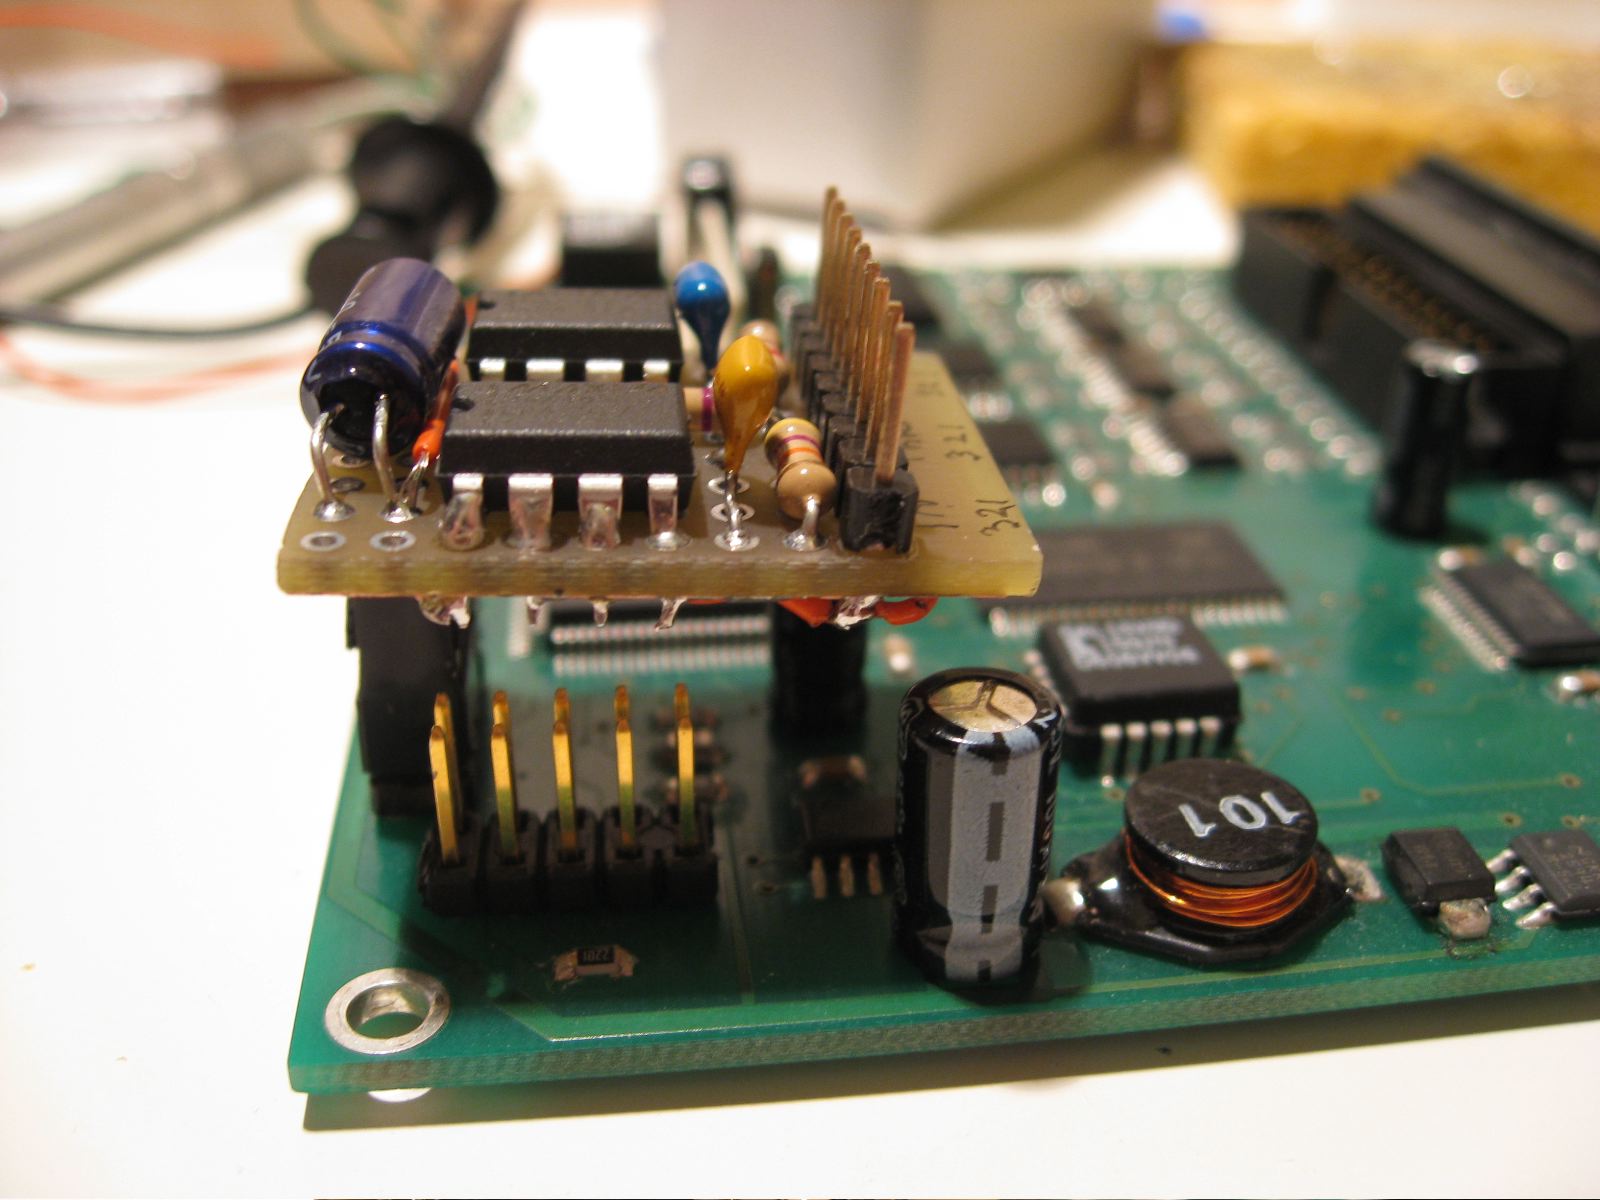
I'm currently busy working on a couple of things, but I realize it has been a while since I've posted updates on anything I've done. Back in September of last year I put together a DMX-512 level converter breakout board for my EasyLase USB.
I'd previously ported and debugged the DMX portion of the driver for the board just using TTL level loopback adapters. I also went on to build the Wonderwall project using the DMX output of the EasyLase, but the level shifter and RS-485 transceivers were all on a solderless breadboard. That needed to be corrected. :)
I'm rather proud of the size of the board--especially being made of all through-hole components. It neatly plugs in to the existing headers, and I think it looks right at home where it has been mounted on the board. All the schematics to build one for yourself are available on the Müller Elektronik website. Enjoy!
20db Inline Attenuator Pad for Earphones
A few years ago I was fortunate enough to acquire a pair of Shure E5 in-ear earphones, which I've greatly enjoyed. They're fantastic headphones, and also some of the most sensitive around. Not only do they just need to drive a tiny bit of air between the diaphragm and my eardrum, but they're rated at 122 dB/mW and have an impedance of 110Ω. They've always been a joy to use with my iPod, but plugging in to my laptop has always meant I had to endure an unreasonably high noise floor, and be careful not to turn the volume up beyond a couple of notches, because any higher would certainly induce pain. Because they're effective at blocking out external noise, I usually listen at a low volume, but despite this I found I was experiencing ear fatigue after even short periods of listening. That hiss was terribly wearing.
Just recently I purchased a Presonus FireBox from Charlie—most likely just as part of my audiophile addiction—and indeed it is a great device. The 24bit/96khz DAC is quiet and outside of the noisy electronic environment of my MacBook Pro. The headphone amp in this thing goes to 11, both figuratively and literally. This is a point of safety concern. Of course there is the standard warning about not listening to audio at a loud volume for extended periods of time, but in this case I feared plugging my E5s into the FireBox. Setting the volume to anything above zero was too loud. I was concerned I might accidentally turn the volume to a dangerous level.
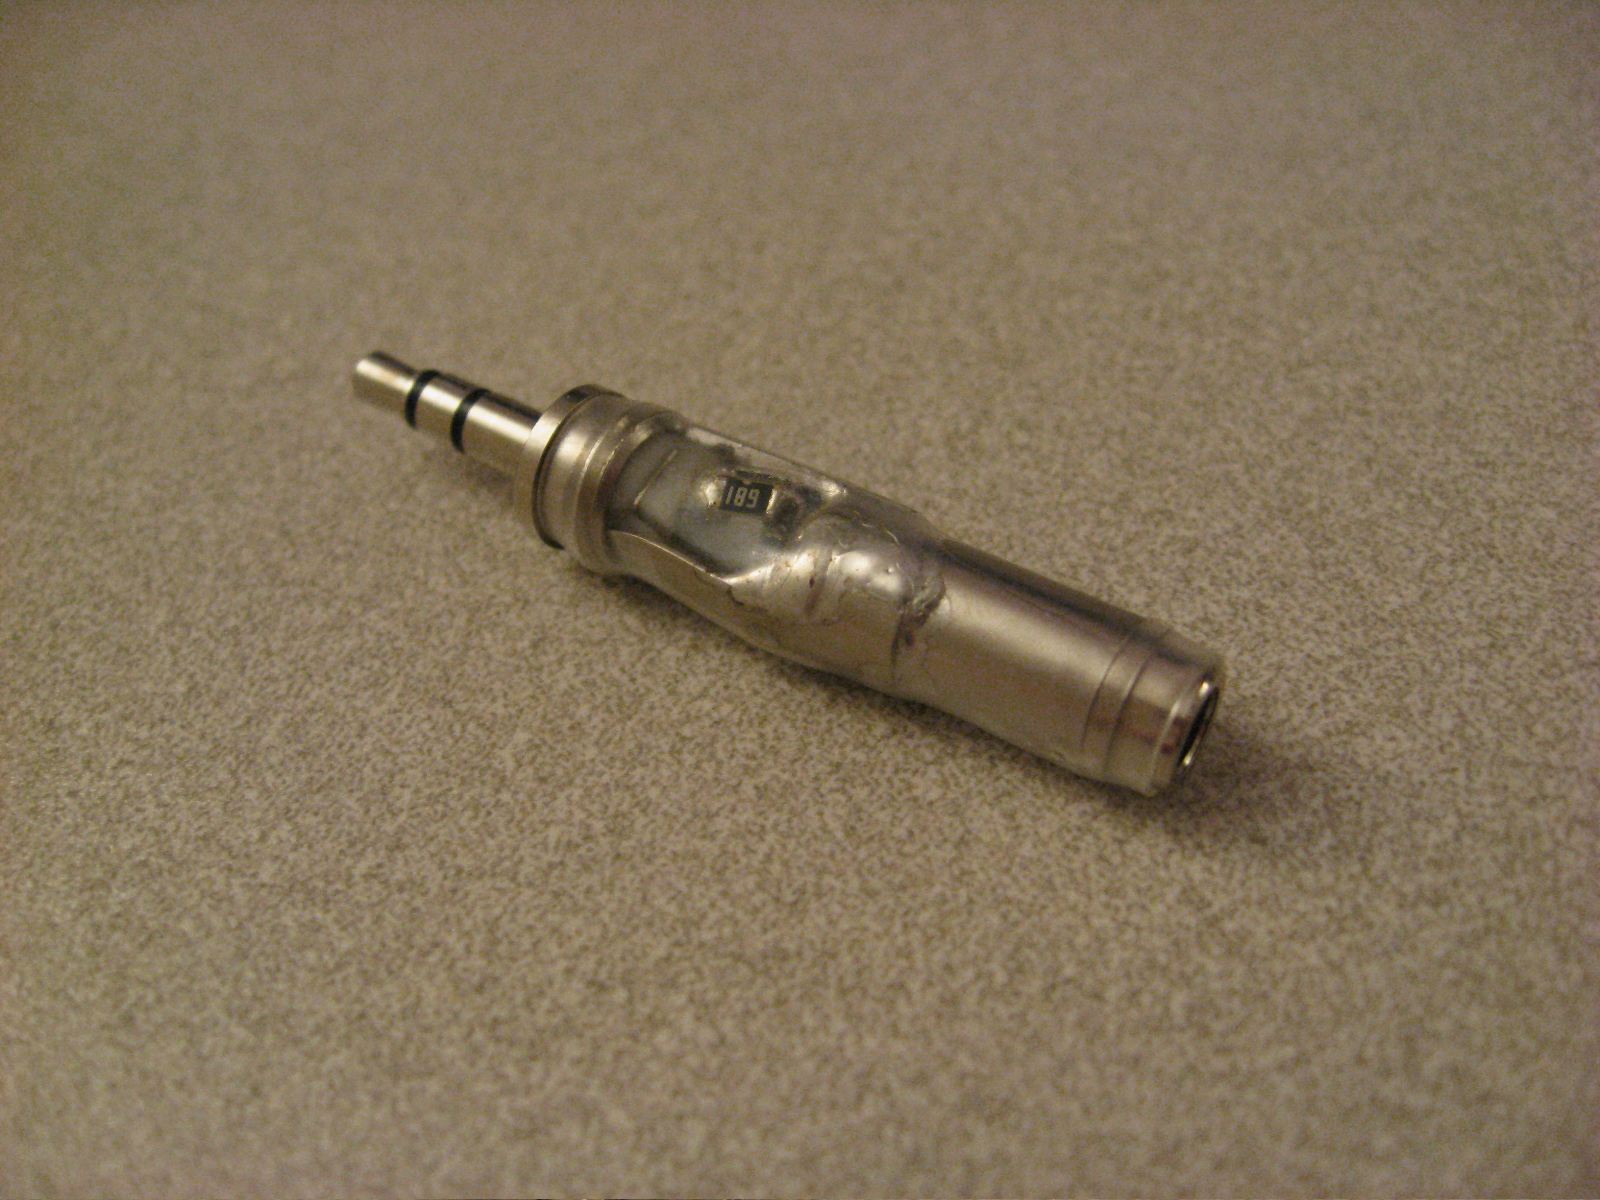
So the solution to all of this was not to buy more expensive equipment, but just stick some resistors inline with my headphones. I decided to build an inline attenuator pad to drop the signal down by about 20db. This solves the above mentioned problems elegantly. It requires I turn up the volume a bit to listen which keeps the signal to noise ratio low on the laptop's internal headphone output, and gives me a safety margin on the FireBox.
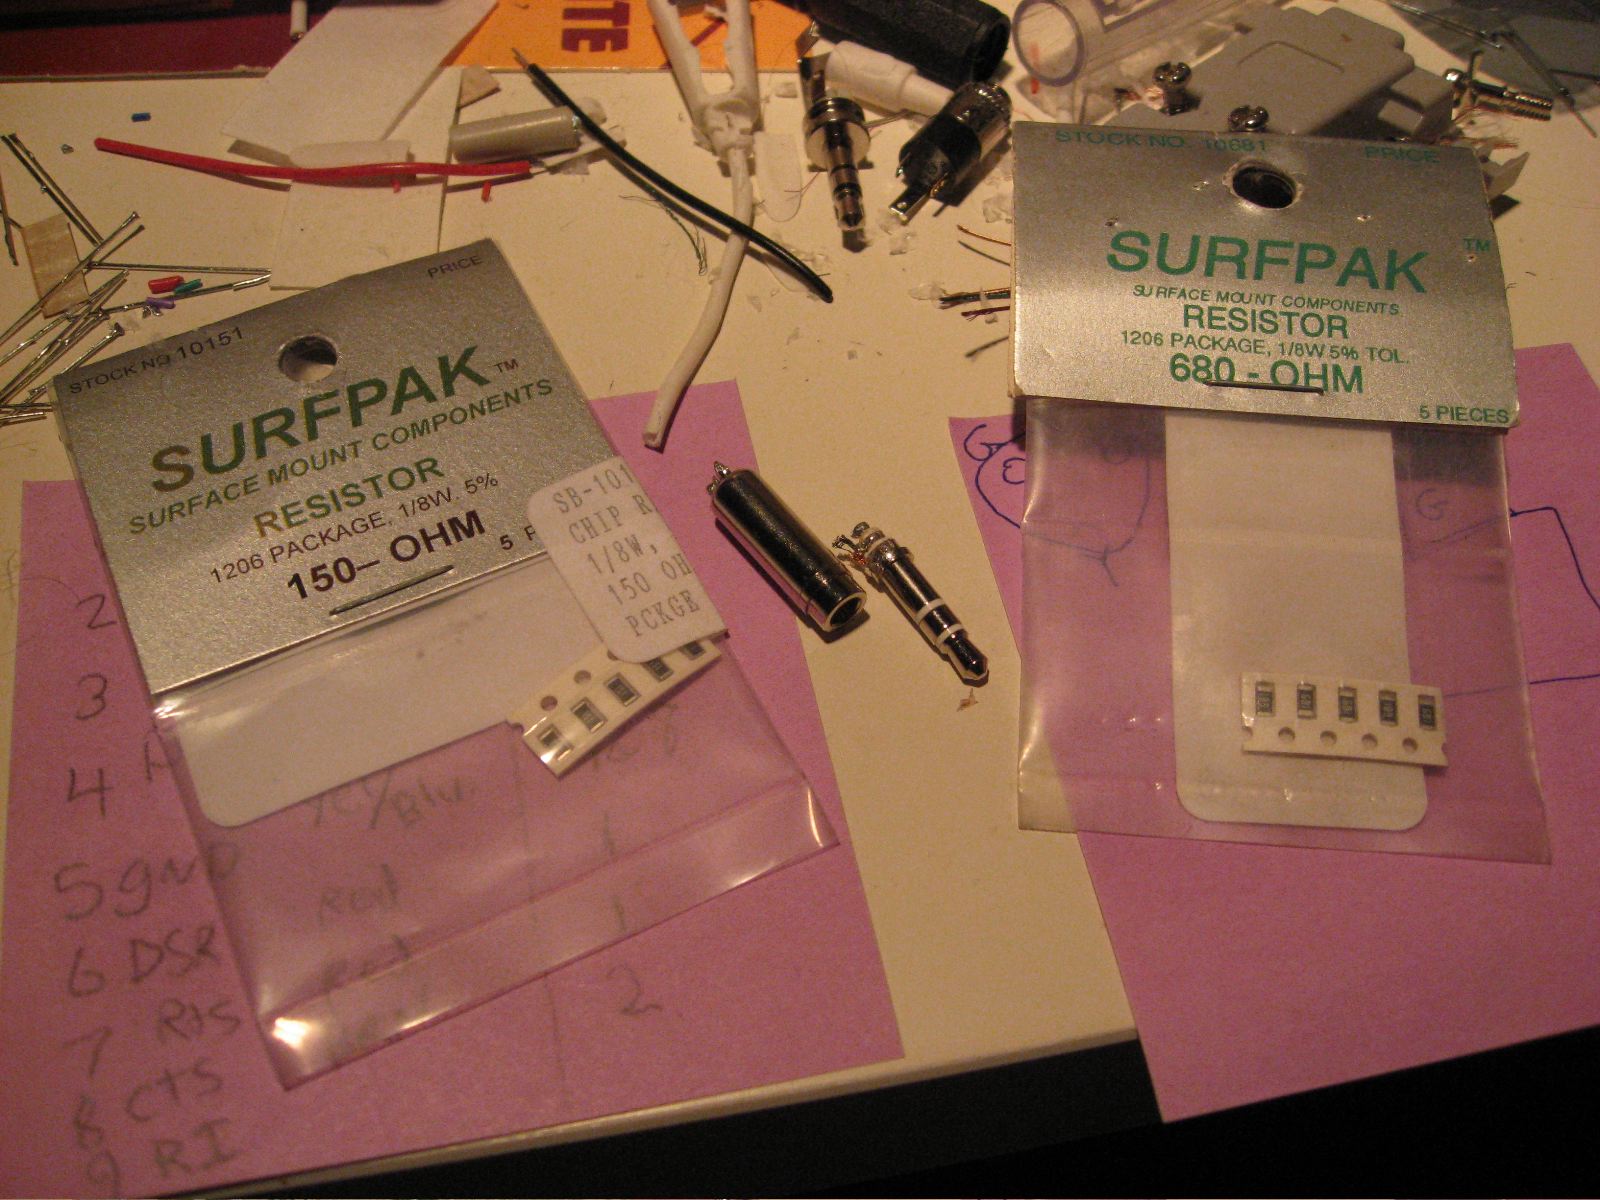
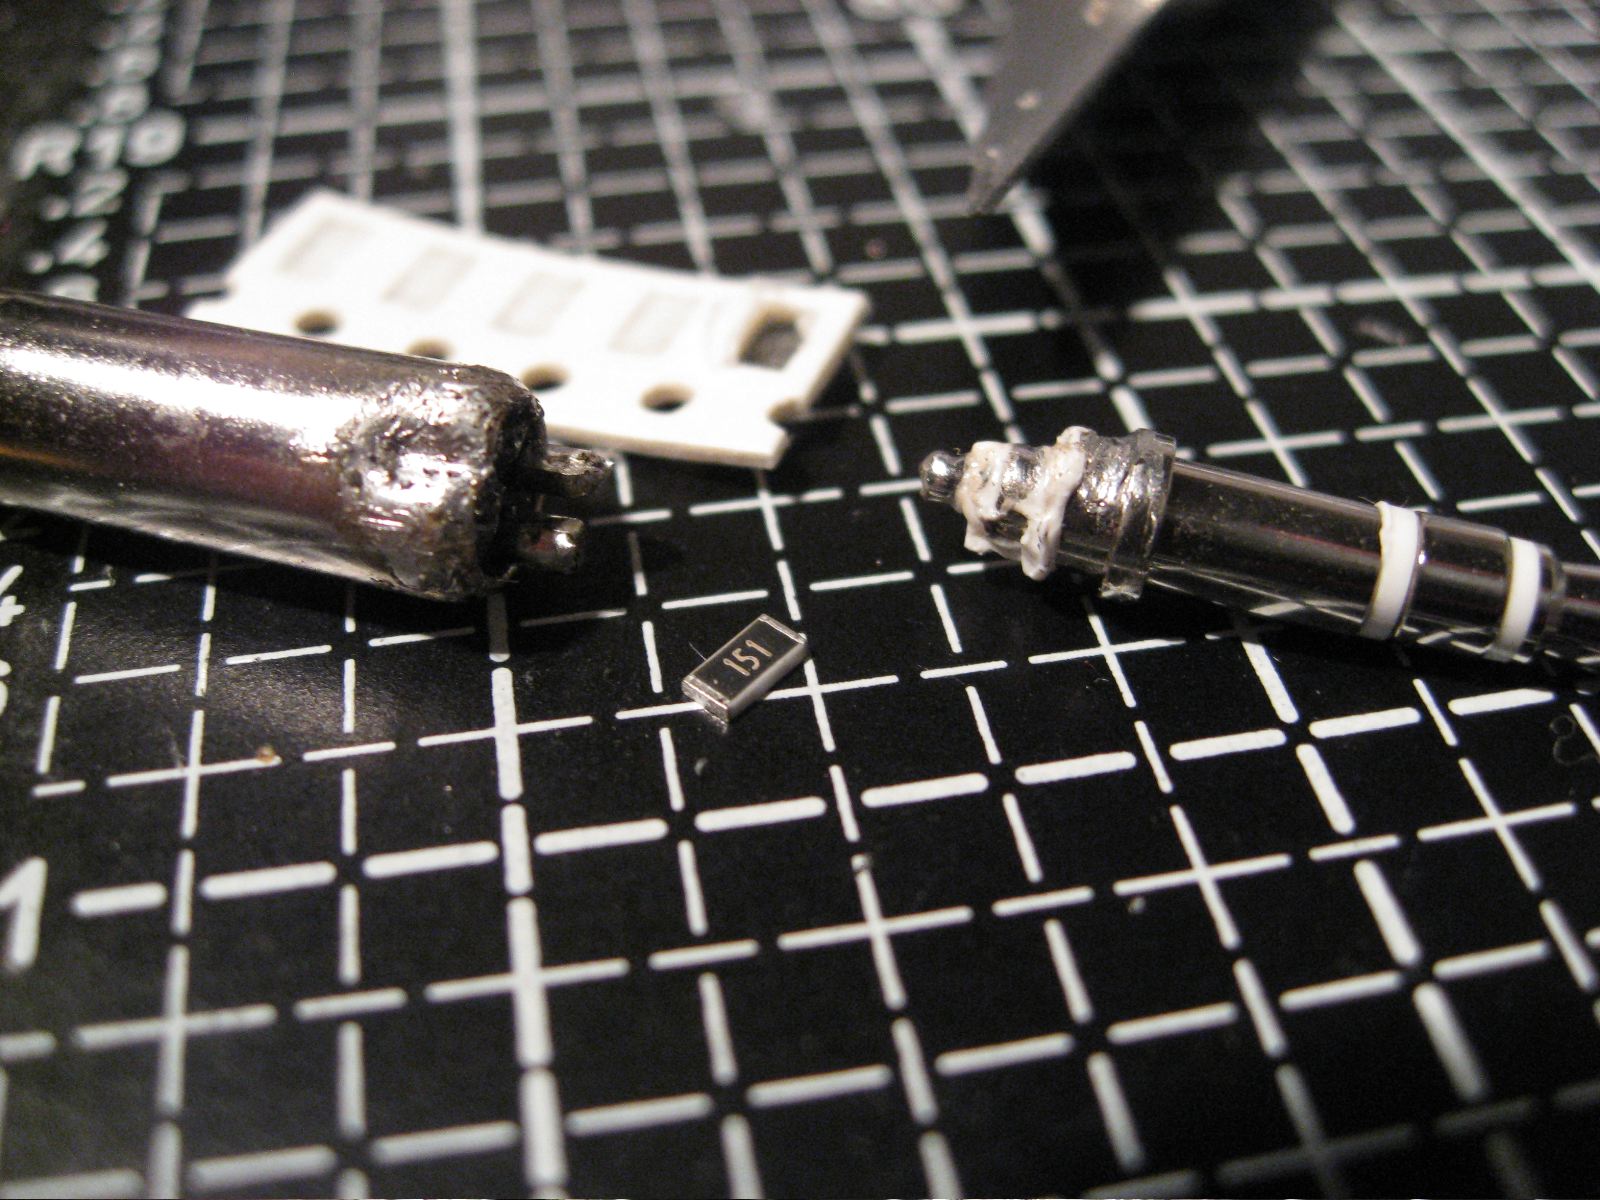
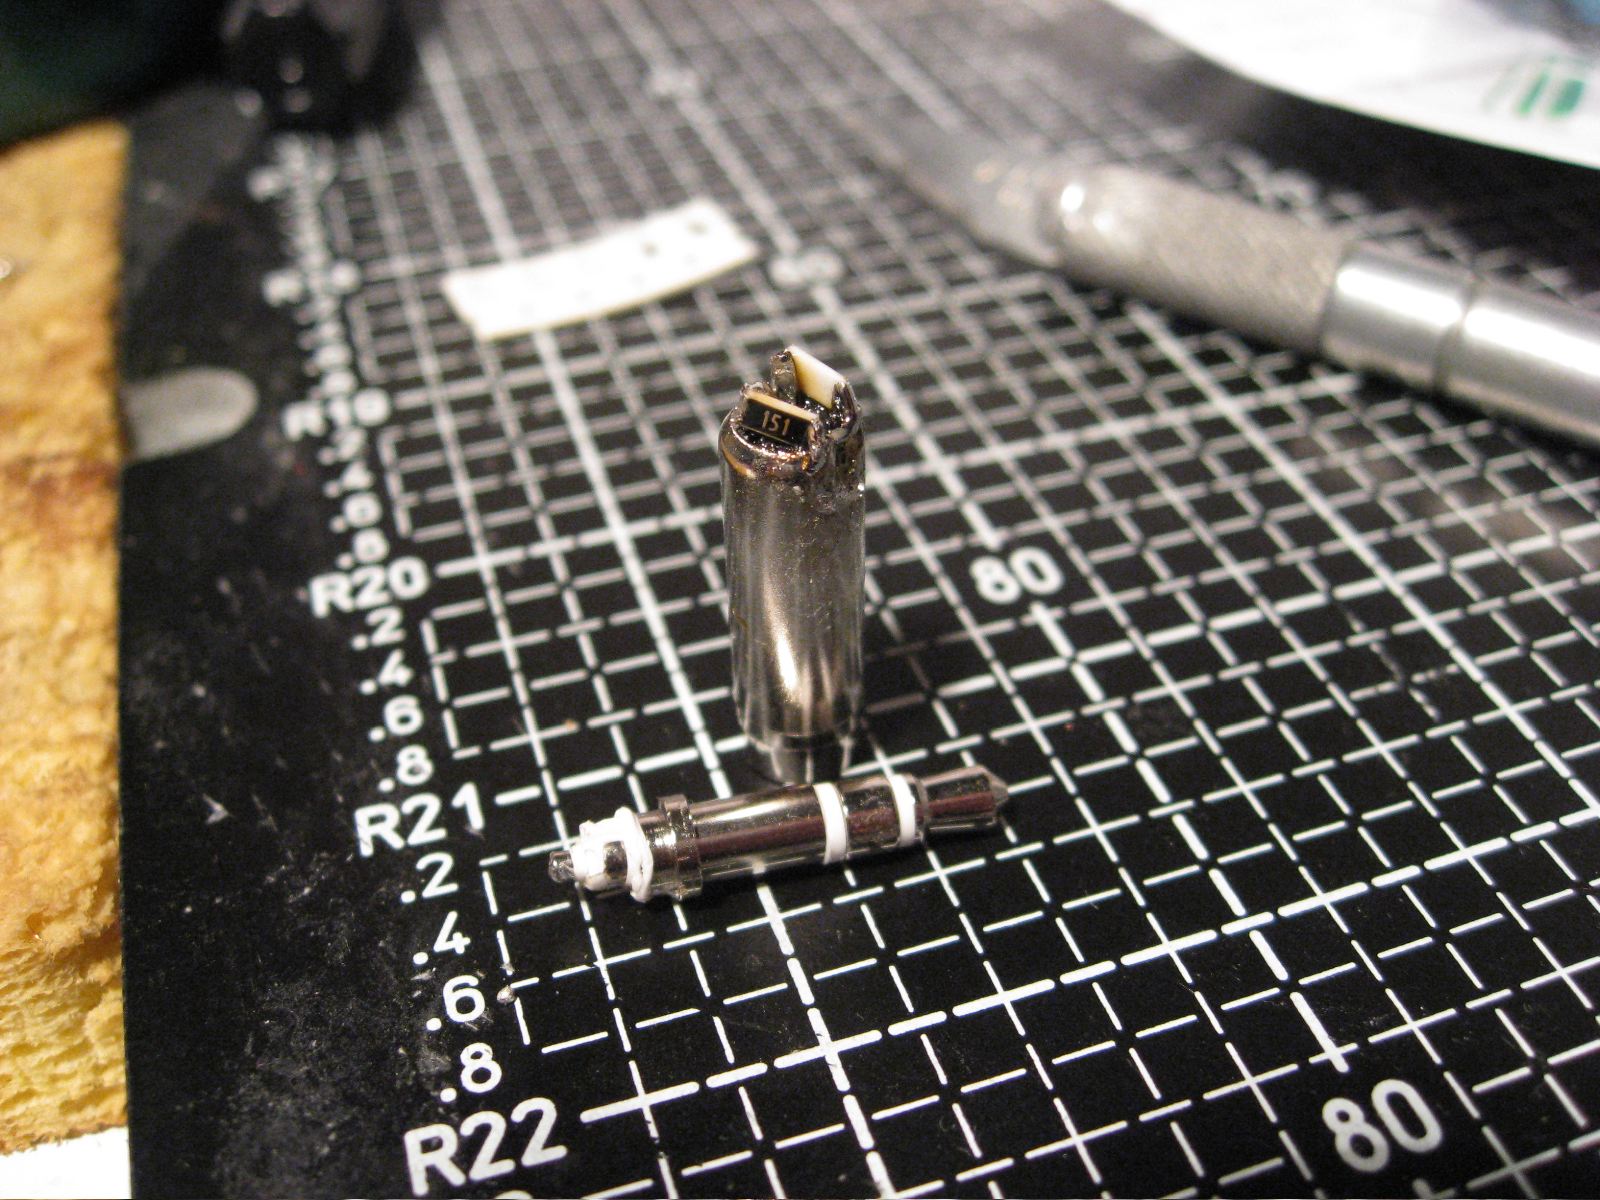
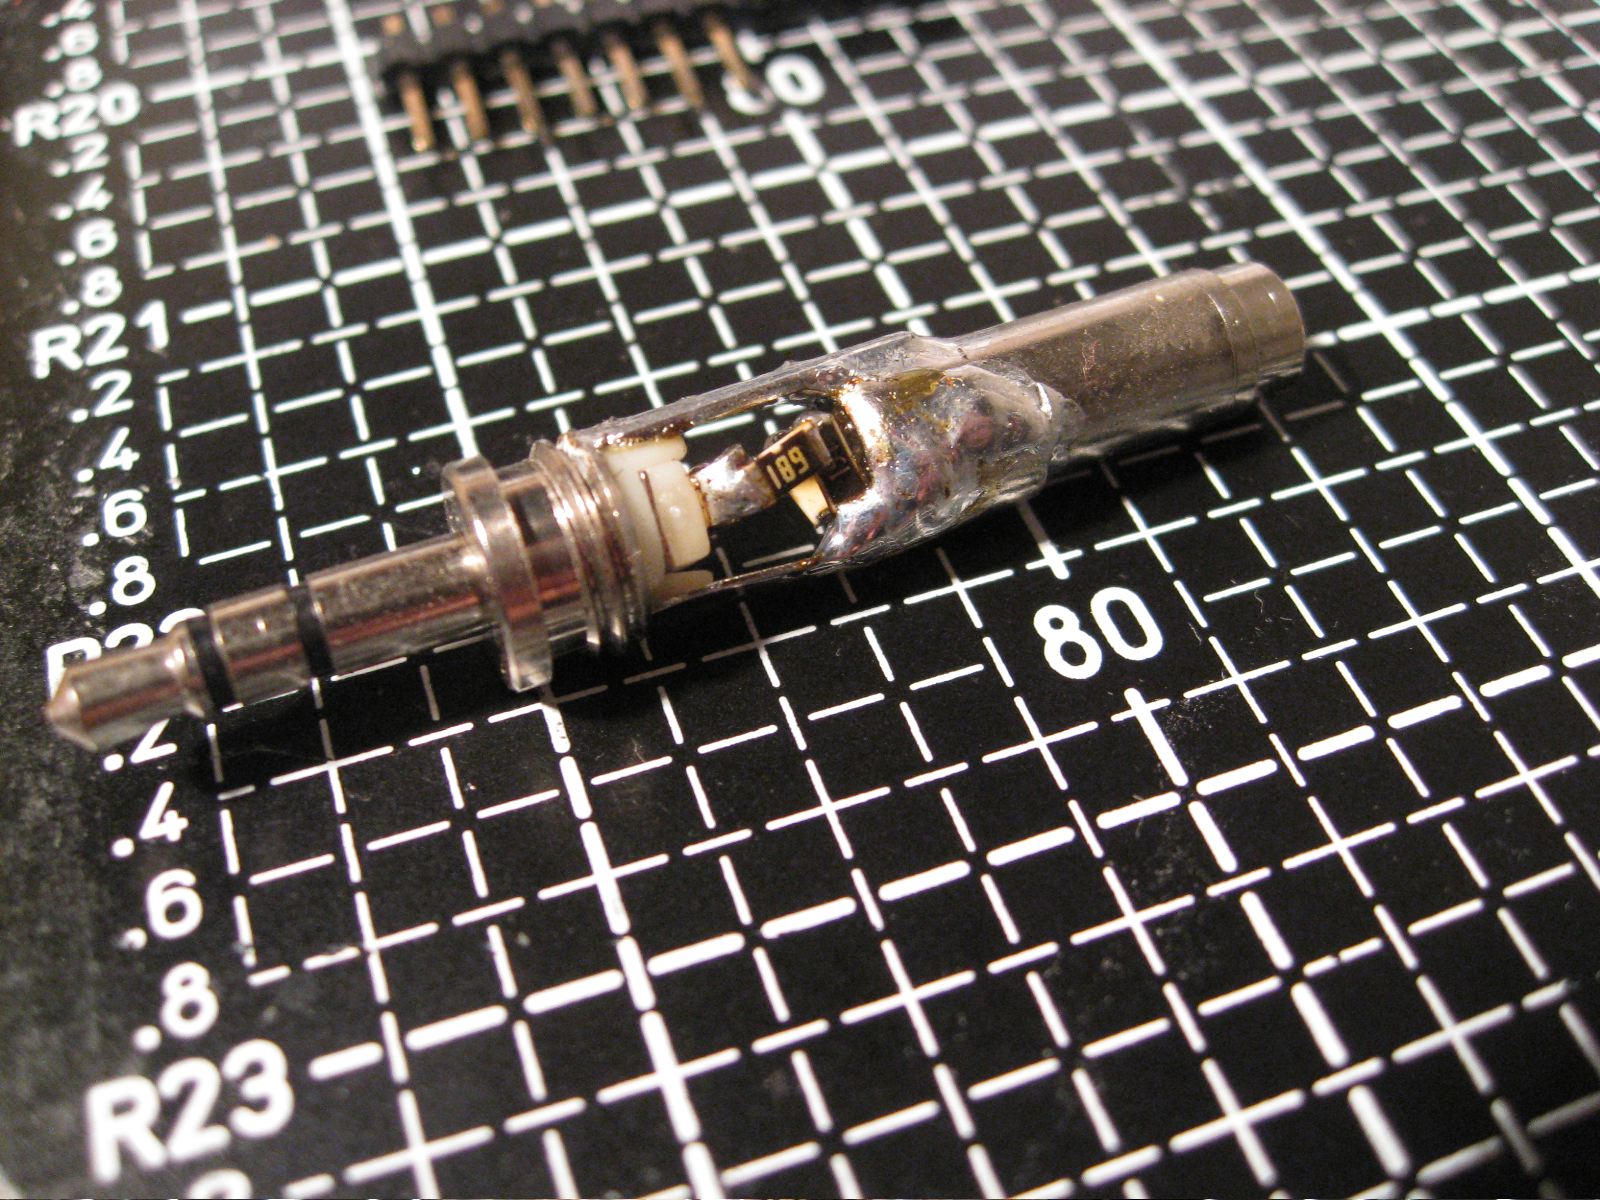
Construction wasn't too involved, but it was a bit tricky to keep everything within the small dimensions I wanted to maintain. I used SMT resistors to minimize space, and had to scavenge the female 3.5mm jack from an extension cable to find one that was narrow profile.
I got most of the design info I needed about making audio pads from this article. It turns out, they're just simple voltage dividers. I'm confident I didn't actually get the 20db I wanted, but it does indeed drop the signal an appropriate amount. I used 150Ω shunt resistors with 680Ω series resistors.

This whole problem of over sensitive headphones is usually solved by sticking a passive volume control inline with the headphones. In fact, new Shure headphones ship with one of those in the box. I chose not to go that route here, not only because I didn't want another volume control to fiddle with, but because this way I couldn't accidentally leave it turned up when plugged in to the FireBox.
Overall I'm happy with the result, despite the fact I had to use clear heatshrink to house the pad instead of red. Perhaps i'll upgrade housings later :).
Let me know if you know of a commercial source for headphone fixed attenuators or you built your own.
Darwin ISO-Latin-1 Font

Note: The bitmap is 16pt; other sizes are not recommended.
Update: Cory Klingsporn submitted an updated version that fixes issues with accented characters. Thanks Cory! Get the new version below.
Download Darwin ISO-Latin-1 Font (TrueType):
|
Darwin-ISO-Latin-1.zip. |
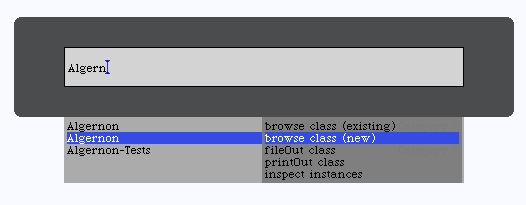
Algernon for Squeak
This semester in Ralph Johnson's Object Oriented Programming class, CS598rej, Erik and I wrote a cool program for Squeak called Algernon.
Algernon is a keyboard-based launcher that provides lightning quick access to categories, classes, morphs, and global variables in your image. It's inspired by similar tools like Quicksilver and LaunchBar for Mac OS X. We're really proud of it, as it seems to really increase productivity. If you're a Squeak user, I encourage you to check it out.

Class Project Page
Development Home
SqueakMap Page
subscribe via RSS